How to Set Shopify Inventory Levels

Byteline allows you to set Shopify inventory levels using Shopify - Set Inventory Node. In this documentation, we have explained the steps to set Shopify inventory using Byteline.
Let’s get started.
Configuring Shopify - Set Inventory Levels Node
Step 1: Click on the add button to view the nodes in the select node window. Here we are adding the Shopify - Set Inventory Levels Node after the Google Sheets - Read Values, but you add it after any node based on your use case.

Step 2: Select the Shopify - Set inventory levels to add it to your flow.

Step 3: Click on the edit button to configure Shopify - Set Inventory Levels Node.

Step 4: Click on the SignIn to Shopify button to connect the Shopify Adjust inventory levels node with your Shopify account. Enter your shop name in the text field and then click on the Sign in to Shopify button.

Mapping from Google Sheet
Step 1: Click on the selector appearing next to the inventory Item Id to map value using the Byteline expression. You can use values from any of the flow nodes that come before the Shopify node that you're configuring.

Step 2: Click on the variable to pick its path.

After choosing the variable, the below-mentioned field will be automatically fetched.

Step 3: Click on the selector appearing next to the Location Id to map data using an expression.

Step 4: Click on the variable to pick its path.

After choosing the variable, the below-mentioned field will be automatically populated.

Step 5: Click on the selector appearing next to the Available to map data using an expression.

Step 6: Click on the variable to pick its path.

After choosing the variable, the below-mentioned field will be automatically populated.
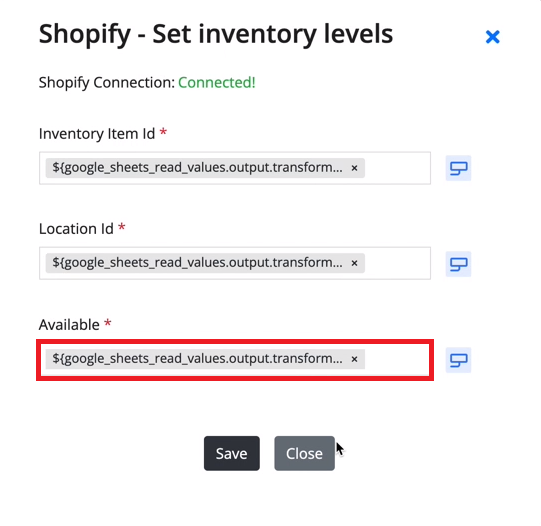
Step 7: Once done with mapping click on the Save button.

You have successfully created the flow to set Shopify inventory levels.
Test Run the Flow
Click on the Test Run button to test the flow. Test run also deploys the flow.

View Output Values
Once the flow runs successfully, click on the "i" button to view the output values.

You have successfully configured the flow to set Shopify inventory levels.
Feel free to connect us for any doubt.